
THINGS USED IN THIS PROJECT

STORY
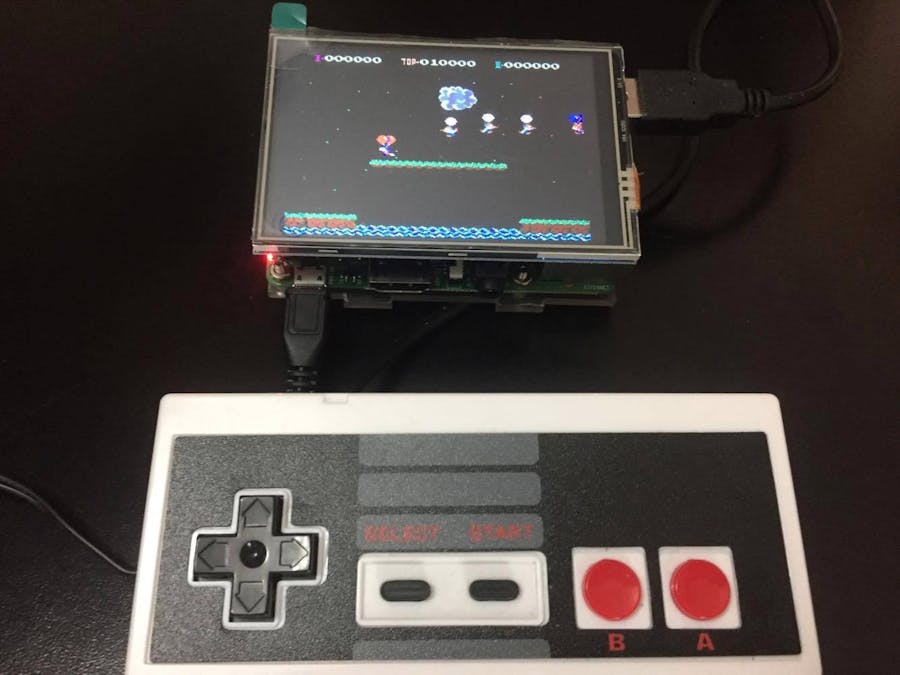
Understanding that many people have problems configuring their TFT display on the Raspberry Pi together with RetroPie, I have decided to make this step-by-step of how to install the TFT 3.5" display which you can connect directly to the GPIO ports of the Raspberry Pi and run your applications. A lot of people have been buying this TFT display from Amazon and other online markets for its economical price but it is not an easy display to install for certain applications, compared to other displays that come with integrated HDMI ports that will surely be a lot easier to manipulate and start working.
So, let's start.
Step One: Display Assembly on Raspberry PI
Please be very careful removing the display from the box that it is sent in, and connect it firmly to the GPIO port of your Raspberry Pi.
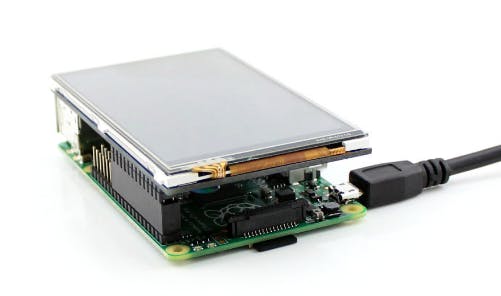
http://www.robotshop.com/media/files/images2/35i-tft-lcd-320x480-touch-display-raspberry-pi-desc2.jpg
I advise you to buy a GPIO cable or a ribbon cable to connect the display to the Raspberry Pi, because sometimes (and it happened to me) at the time of manipulating the display and fitting it on the pins of the Raspberry, the screen being so the thin can be broken easily.
Step Two: RetroPie on Raspberry PI
Verify that you have RetroPie burn on your SD Card, if you have not already done so, click on the following link, install it and come back here to continue the steps.
Step Three: Connect to the Raspberry Pi via SSH
- Turn on your Raspberry Pi and make sure it is connected to Internet.
- Go to RetroPie settings, then RaspConfig and turn on SSH.
- You can use your preferred ssh client as Putty, WinSCP or in my case I will use Terminal in my MAC to connect to the Raspberry Pi.
With Putty:
- Put the IP address of the Raspberry Pi
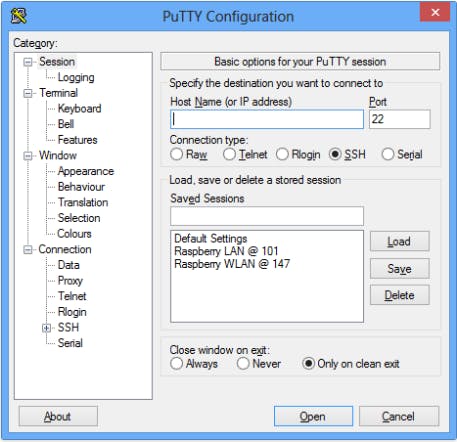
- User: pi
- Password: raspberry
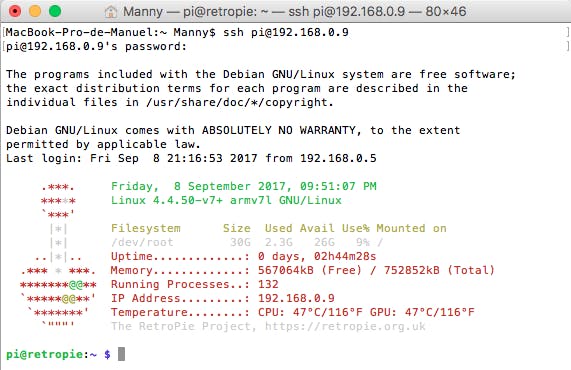
With MAC:
- Open Terminal and type the following:
ssh pi @ (raspberry ip address)
- Password: raspberry
Step Four: Commands for Installation
Start with:
cd curl -O https://raw.githubusercontent.com/adafruit/Raspberry-Pi-Installer-Scripts/master/pitft-fbcp.sh
sudo bash pitft-fbcp.sh
Now press Y to continue and select the best options in the menu just pressing 1 or 4. After that let the system install and do not restart.
Next, copy the following code to download the best driver from Github:
git clone https://github.com/goodtft/LCD-show.git
chmod -R 755 LCD-show
cd LCD-show/
chmod +x LCD35-show
./LCD35-show
Restart and you should see the content on your Kuman 3.5" display.
Step Five: Troubleshooting
If, after installing, the screen is a mess together with the TV missing icons or words, please connect via SSH to your Raspberry Pi and run this command:
cd RetroPie-Setup/
sudo ./retropie-setup.sh
This will take you to the main menu of RetroPie, where you must choose:
update all installed packages
As soon as the installation is complete, restart the system and you will have your screen working together with your TV.
FIX LCD Lag
If you start to play you will notice that the game is not very fluid on your screen, the way to fix this is by making some changes at the Config File. Remember to connect via ssh to your Raspberry Pi to run this command:
sudo nano /boot/config.txt
The previous command will open the Retropie configuration file where in the end you have to look for something like SPEED and FPS and change the values to something like:
dtparam=audio=on

dtoverlay=tft35a,speed=62000000,fps=40,rotate=90

#dtoverlay=ads7846,cs=1,penirq=17,penirq_pull=2,speed=25000000,fps=20,keep_vref$

gpu_mem_256=128

gpu_mem_512=256

gpu_mem_1024=256

overscan_scale=1
This configuration works for me personally, but feel free to change the parameters to the one that best works for you.
I hope these steps will help everyone to configure the display with their Raspberry Pi in Retropie and in general.
YouTube tutorial .....
FOLLOW ME OTHER SIDE ⇩⇩⇩⇩⇩⇩⇩⇩
Thanks for the step-by-step guide.
ReplyDeleteSome issues (that I later resolved) were: -
The line of code beginning: cd curl...…
Gave the response (too many arguments)
Also, under the section 'fix LCD lag', the text file 'config.txt' didn't contain any of the lines that you showed, i.e. dtoverlay= gpu_mem_256= and so on.
Apart from that, it all worked well. For anyone wanting to get this done, I combined this tutorial with the steps outlined on the adafruit website.
https://learn.adafruit.com/adafruit-pitft-3-dot-5-touch-screen-for-raspberry-pi/easy-install-2
Thanks!
i got the same error on the ffirst line can u help me?
ReplyDeleteHi,
ReplyDeleteCheck my first comment. Use the link to the adafruit website tutorial. They fill in the gaps and help make sense of everything.
Andrew